
The home page is something that you should not ignore when creating an eCommerce website. It is one of the important aspects of any online store that attracts and creates interest in people in your services or products.
Learn how to create an effective and impressive Home page for an eCommerce site.
How to Add a Home Page to an eCommerce Website
You can create an impressive homepage for your website or online store by following these steps.
Step 1: Go to the Dashboard of the WordPress website and click on “Pages” from the left sidebar.
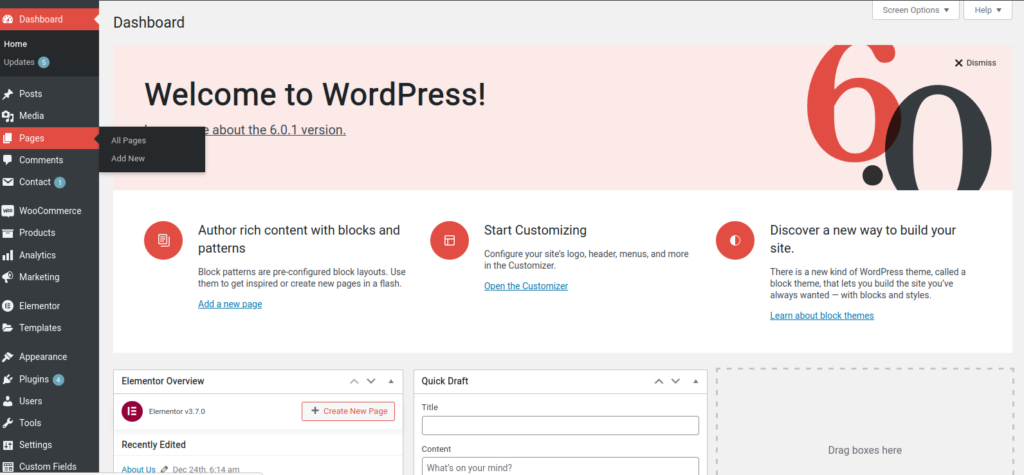
Step 2: Click on “Add New” from the top left side to create a new page.
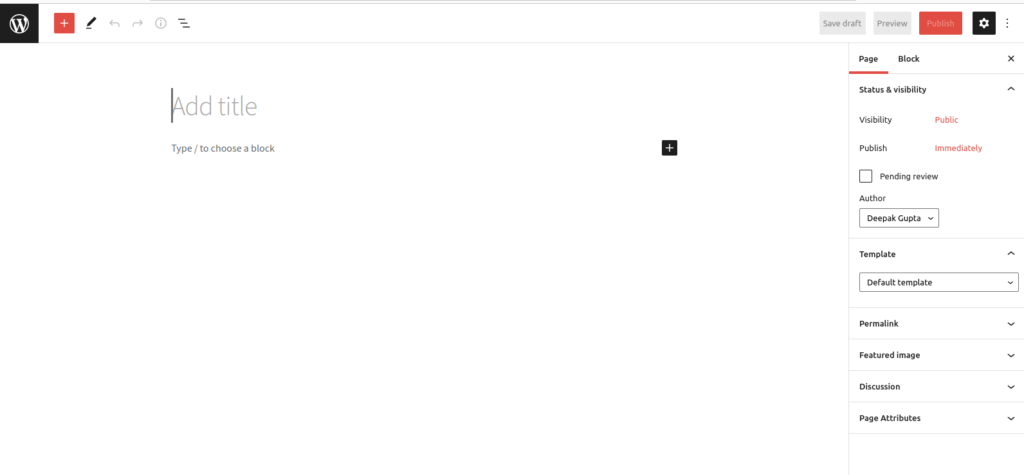
Step 3: You need to enter the page title, which will be “Home,” in this case.
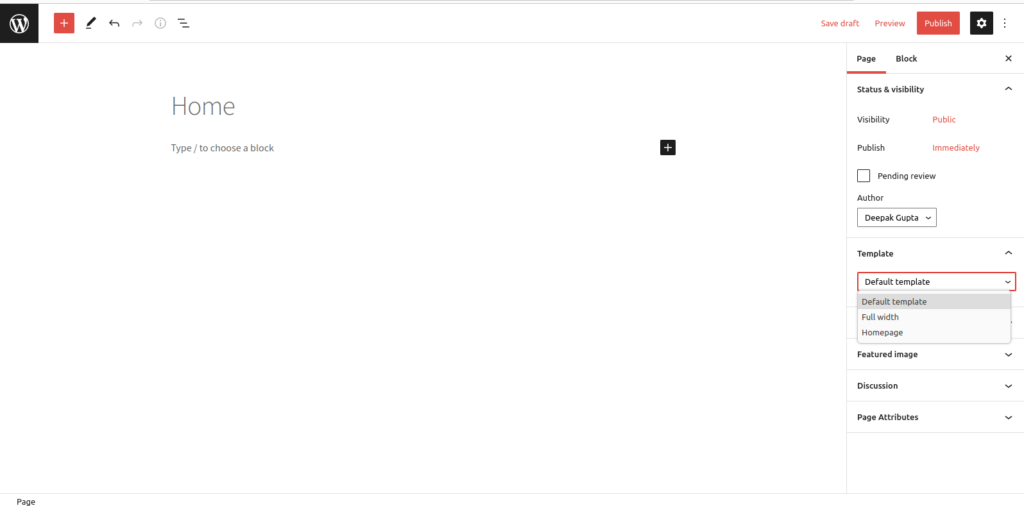
Step 4: Go to “Template” from the right sidebar and select “homepage .” After this, click on “Publish.”
Step 5: You must add the Home page to your menu by following the steps below.
How to Add Home Page to Menu
Adding the home page to the menu is very important for an eCommerce website to make it visible at the front end. Here are the steps to add a home page to the menu or to edit the menu in WordPress for the home page:
Step 1: To add the “Home” page to the menu, go to Dashboard and select “Appearance.”
Step 2: Now, under “Appearance,” click on “Menu.”
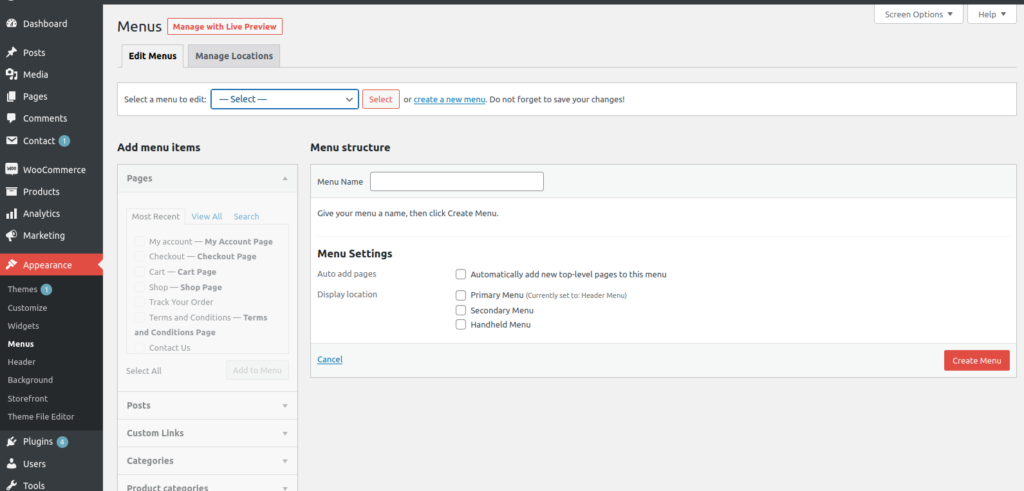
Step 3: On the next page, select “Home” and click on “Add to Menu.”
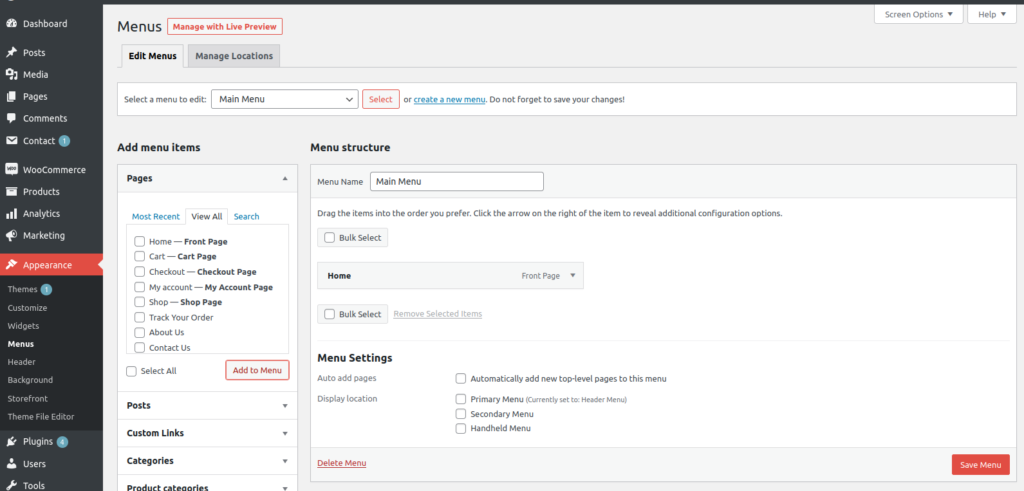
Step 4: Now, drag it up to the top to make the “Home” page appear first on the menu
In the end, click “Save Menu .”Next, you need to customize the Home page to make it more impressive.
Follow these steps to Customize the Home Page.
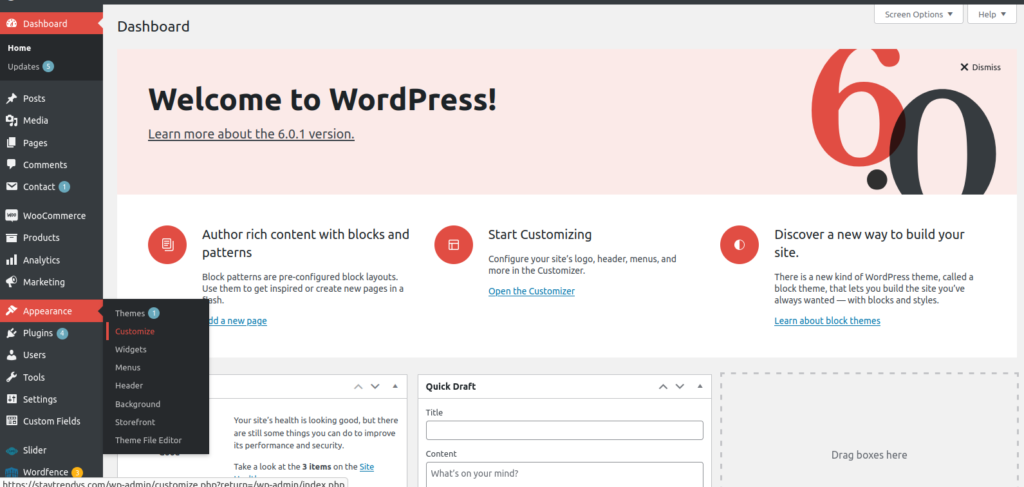
Step 1: Go to “Customize” from the left sidebar of the “Dashboard.”
Step 2: Come down to “Static Front Page”
Step 3: From the drop-down options, choose the “static page.”
Step 4: Now, under the “Front Page” drop-down options, choose “Home .”Finally, click on “Save and then “Publish” it.
Next, know how to control the home page.
Guide to Control or Manage the Home Page of eCommerce website
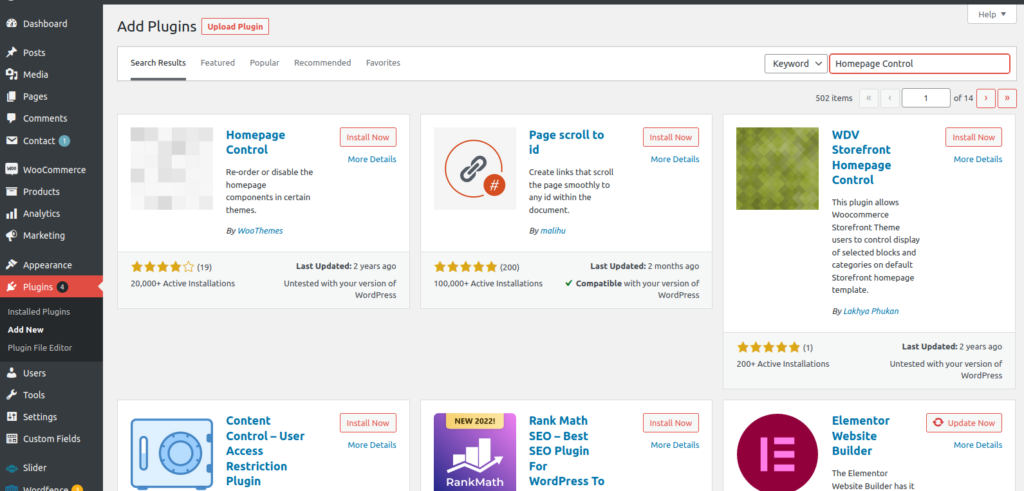
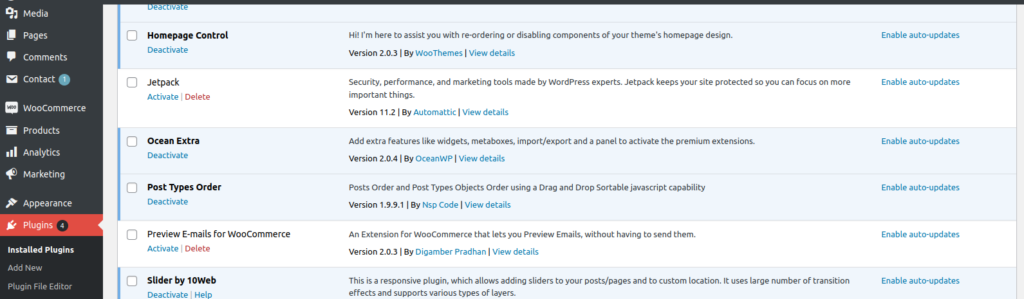
For controlling the home page, there is a plugin called “Homepage Control .”Here are the steps to install and activate the plugin:
Step 1: Go to “Dashboard.”
Step 2: Click on “Plugins.”
Step 3: Now, click on “Add New.”
Step 4: On the next page, search for the required plugin – Homepage Control.
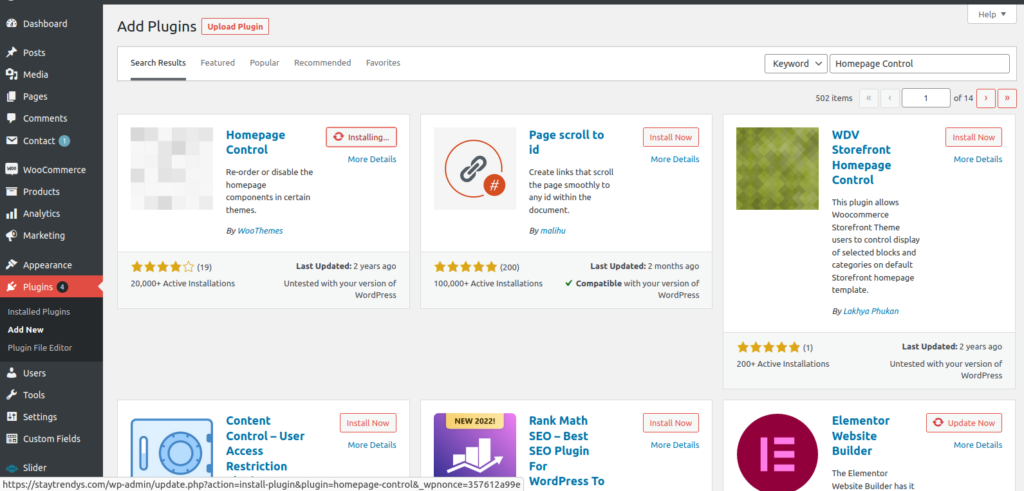
Step 5: Click on “Install” and “Activate.”
Step 6: Now, go back to Appearance > Customize.
Step 7: You can see the “Homepage Control plugin” on the left sidebar.
Step 8: Click on the “Homepage Control” to go to the next page. You can see Shop By Categories, New In, Popular Products, and many other sections here.
To remove anything that you don’t like, check them off.
Guide to Add Home Page Image Sliders on eCommerce Website
Image sliders can make the home page look more attractive and impressive. Visitors will love to navigate through other products looking at the variety in image sliders. Here are the steps to add an image slider on an eCommerce website.
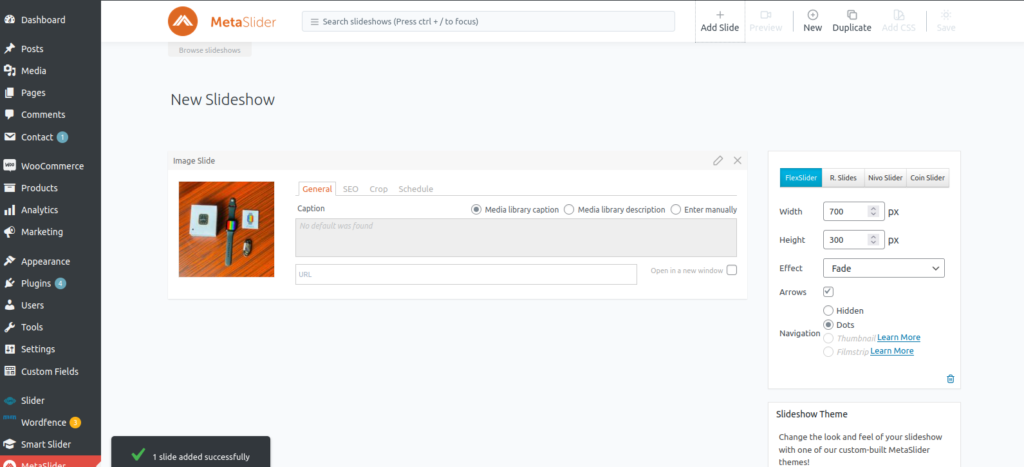
Step 1: To add an image slider to the eCommerce website, install the plugin – Meta Slider.
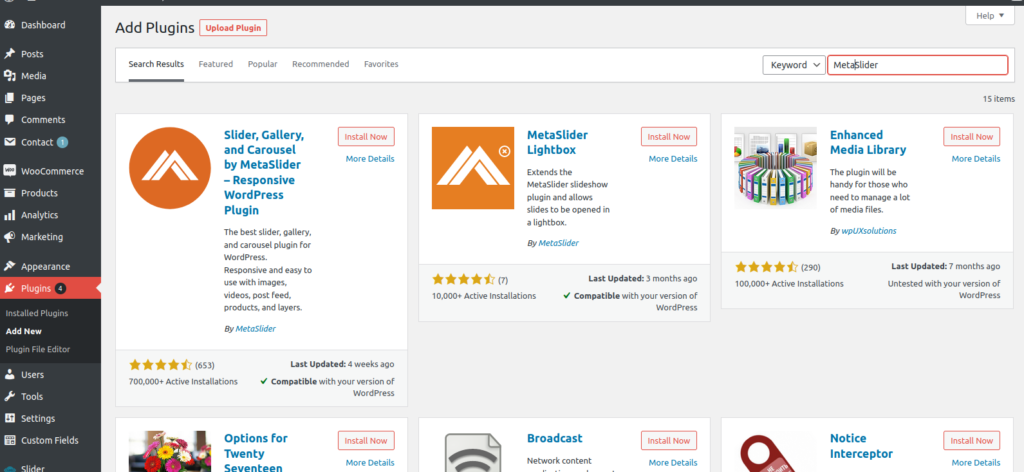
Step 2: Once you install and activate the plugin, you can see this plugin in the left sidebar of “Dashboard .”Click on it.

Step 3: On the next page, give a name to the page as the Home page.
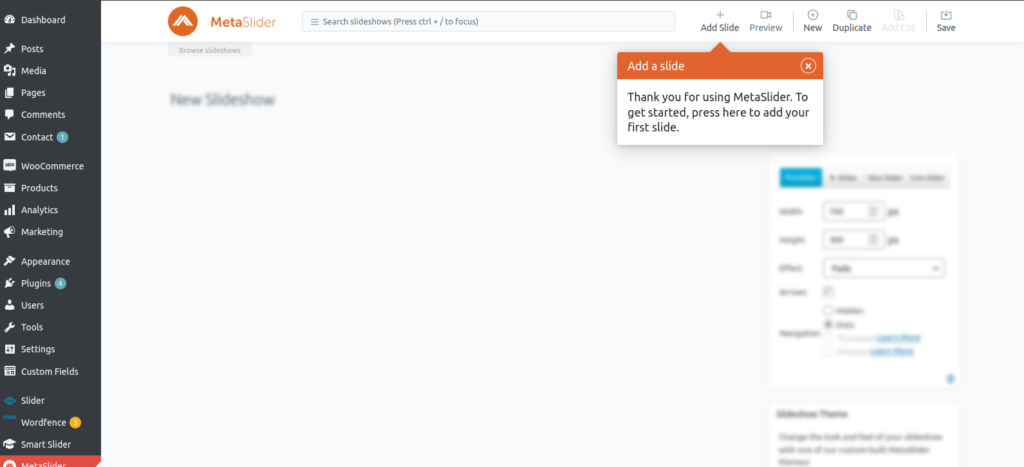
Step 4: Now click on “Add Slide” this will take you to your media folder.
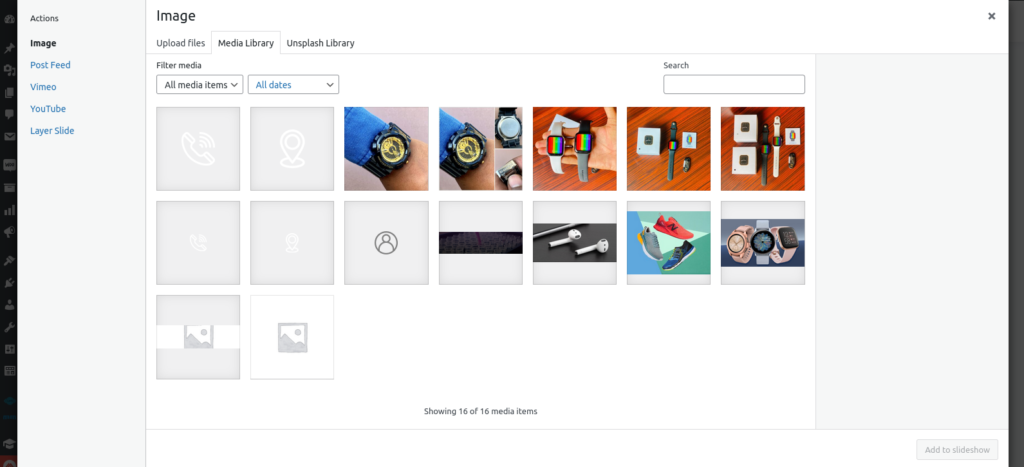
Step 5: Select the number of images from the media library and click “Add to Slide .”Next, you need to set the images in the appropriate size to all look even and good.
Step 6: Add captions and URLs of particular parts of your site if you want. Finally, click on “Save.”
Step 7: Next, go to Appearance and click on Editor
Step 8: Then, from the right sidebar, click on the “Theme functions”
Step 9: In the text part, add a code you can see in the screenshot at the end.
In the end, it is important to create a responsive website, and a home page is a must for eCommerce websites to increase revenue. You can follow the above-mentioned steps to create an impressive Home page for an eCommerce website.